So, you’re ready to grow your own organic veggies, but have never gardened in your life and have no idea where to begin. Perhaps you are like my friend Sarah and consider yourself to be an accidental plant murderer and have a black thumb (sorry Sarah). I bet there are a million questions flying through your head, like “what kind of soil do I use?”, “Should I plant in a container or the ground?”, “How much light do plants need?”, “How much water?”,”Will I be a competent vegetable parent?!”
While all these questions are Google-able (except for the last one, just answer YES), I get that there’s a zoo of information out there. Sometimes too much info makes decisions tougher and it can be insanely overwhelming.
But have no fear: I will break it down for you here! (haha, that rhymed.)
The Beginner’s Guide to Growing Your Own Organic Veggies:
1. Start Simple
Whether you have a garden space to work with or not, I believe the best way to get going is by growing in a container. Not only are there many more variables that you can control with container gardening, it’s just generally so much more manageable for a garden-novice.
The fun part about container gardening (OK, I find all gardening fun) is that you can get creative. You can basically use anything as your container, as long as it will hold up to the elements (sun, wind, water) and has drainage.
If you’re a thrift-whizz like myself, don’t go out and BUY new containers that were actually intended for planting in. USE WHAT YOU HAVE!
If you own a drill (I hope so), think to yourself, “Now what do I have that I can drill some drainage holes in?”
If you’re looking for something that can hold a lot of soil, and thus a good deal of vegetables, you can explore the world of plastic storage totes.
2. Grab a Storage Tote and Get Growing
You probably have two or three kicking around, or know someone who does. Or you just saw some on someone’s curb yesterday.
All you gots to do, my friends, is drill some holes in the bottom of them for drainage. Then you have a perfectly viable, large volume growing factory!

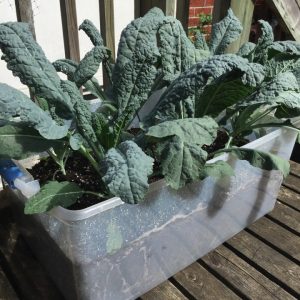
Last summer’s lacinato kale happily growing in an old Rubbermaid storage tote
3. Make it Easy On Yourself: Use a Pre-Fab, Organic Soil Blend
Let me make this clear. If there is one thing you take away from this, it’s that SOIL IS VERY IMPORTANT. Soil is not just “dirt”, it must contain all the nutrients a plant needs to turn from an itty bitty seed into a big healthy chlorophyll-dense veggie machine. Just as shitty food makes our bodies shitty, shitty soil will produce a shitty plant.
But you can make this easy on yourself. You don’t have to fortify your soil with anything if you start with a soil mix that already has the nutrients you need!
To ensure your beginner soil is top notch, fill your storage totes with a pre-fab soil blend like Promix Herb and Veggie Mix. When you become more advanced you can begin adding soil amendments and enriching your soil yourself, but for now, all the work is done for you.
4. Start with Seedlings (pre-grown plants)
Once you get your feet wet and you graduate from the beginner stage, you can start growing your own plants by seed. But for now, hit up a local nursery or garden centre and start off with seedlings.
5. Do Not Overcrowd (Plants Need Personal Space Too)
So you’ve got your tote, your soil, your seedlings, and now you’re ready to plant them in thurr. Overcrowding is a blunder I still make since I am just so excited about packing as much into one area as possible, but plants need personal space. Research how much space the particular plant you are planting needs, and don’t try to cheat it. TRUST ME WHEN I SAY, THE PLANT WILL DO BETTER WITH MORE SPACE! (Okay, now I need to really convince myself that).
6. Water Consistently
I can’t tell you how much water each type of plant needs, but I can’t tell you that pretty much all edible garden plants DO NOT LIKE TO FULLY DRY OUT. Water your plants consistently. Keep your soil moist but not soggy. Watch out for limp leaves; this is usually a sign that the plant is too dry and is fading fast.
7. Be Mindful of Sunlight
Most veggies need about 6-8 hours of full sunlight to really thrive, so put them in your sunniest possible locations.
8. Pick Vegetables With High Success Rates
This all depends on where you live, but generally tomatoes, lettuce, kale, herbs and radishes are very easy and quite foolproof if you follow the above directions (Note: radish is the exception to the “don’t grow from seed yet” rule. You will not find radish seedlings, because they are SO easy to grow from seed. Grow them from seed.).
9. HAVE FUN
Remember, with all things in life, shit happens and maybe it won’t work out 100%, but you will always learn from it, so have FUN! Maybe a rogue squirrel will dig up your lettuce, or a pesky elephant will snipe your kale. But that’s all part of the adventure. If you follow my steps above I guarantee you will grow SOMETHING edible this summer, so just friggen’ start.
YOU CAN DO IT!!
Now wanna eat some flowers? Click here to learn about my 6 favourite edible flowers.

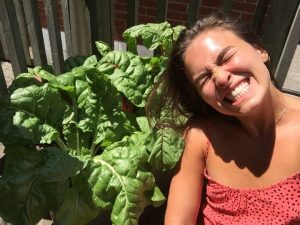
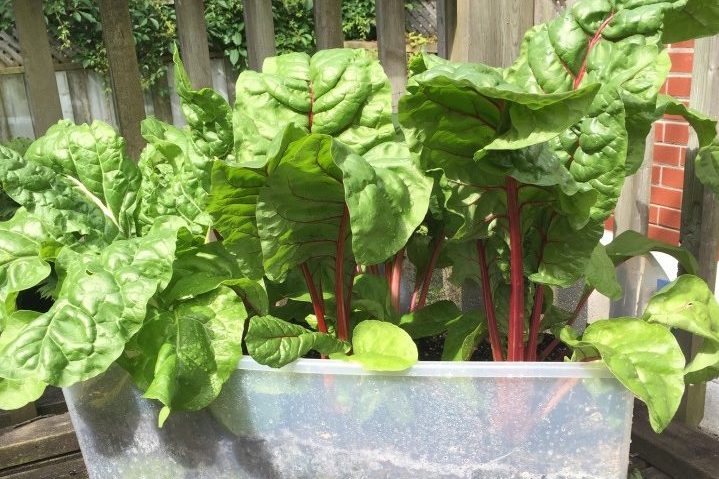
Me and my container chard.
Laura Franklin, CNP, FMCHC
She is here to preach what she practices and help you to prepare amazing whole food meals from scratch, grow your own organic food and optimize your lifestyle and environment to promote the most vibrant, glowing and energetic you.
Laura is currently based in Dundas, Ontario, Canada but works remotely with people from all over the world!
Latest posts by Laura Franklin, CNP, FMCHC (see all)
- Let’s Get Real: My Personal Health Journey (Part 3) - July 11, 2020
- IG: It’s happening… one of my fave vegetables is coming to life in the garden🤩🥦. Grew these baddies from tiny seeds started back in March.Have you seen brassica seeds? They’re like, sesame seed size but round. Tiny AF.Crazy that those wee balls of life can turn into something like this. Actually amazes me every time and never gets old. May be one of the reasons I love gardening so much.Anyway, these guys get bigger each day and I’m so stoked to eat them.Side note: please pray that the deer don’t get them before I do 😭I had an invader Wednesday night that ate all my green tomatoes, carrot tops, Swiss chard, a large head of romaine lettuce and my bean plants 😱. Stay safe little broccolis, you’re awesome - June 26, 2020
- IG: So I post a lot about gardening… I know. Butgrowing my own food is just one element of my decision to pursue lifelong health personally AND as a career.When my hands aren’t in the soil cultivating plant life, I’m on ZOOM calls with clients as a Holistic Nutritionist and Functional Medicine Certified Health Coach cultivating optimal health.I coach and guide my clients one-on-one towards renewed health and high performance using the fundamentals of Functional Medicine… a modality that is near and dear to my heart.I decided to specialize in Functional Medicine because a few years ago, I was a patient of Functional medicine myself. When I found myself in the throws of mystery chronic illness that could not be diagnosed or resolved via conventional medicine or other nutritional and natural therapies, I just knew there was something that was being missed.Upon pursuing Functional Medicine, which looks for the deepest root cause of what’s going on in the body individually, we immediately found the causes of my health challenges and were able to efficiently and appropriately steer me towards a path of renewed optimal health. Within 8 months, my life had completely changed and I was operating at a completely different level of vitality. Functional Medicine changed my life with the gift of renewed health from which I operate as a wellness leader today.So. If you, or someone you love could use help finding some answers to your chronic health issues, or just want to operate at an even higher level of performance and/or vitality, I encourage you to look into Functional Medicine.If you want to chat more about what I do and how my colleague @drnavazhabib and I can support you at our practice @healthupgraded, DM me.If this information helps just one person find answers and better health as it did for me years ago, I will be thrilled - June 22, 2020


One Comment on “The Beginner’s Guide to Growing Your Own Organic Veggies”
Thank you SO much Laura. I am all inspired again. Cant get seedlings yet (nursery still closed on lockdown.)… but i can prepare my planting space in the mean time…. have a great weekend. Margie